It’s no secret: The Apple Vision Pro has officially been released!
With it comes a new era of virtual computing and a new hype in app development.
Let’s take a look at how to create a Flutter App in Vision Pro:
Set up your Xcode environment
First, open your ios folder from your normally created Flutter app. You can do so in VSCode by right-clicking the ios folder and selecting Open in Xcode. Alternatively, run the following command in your Terminal:
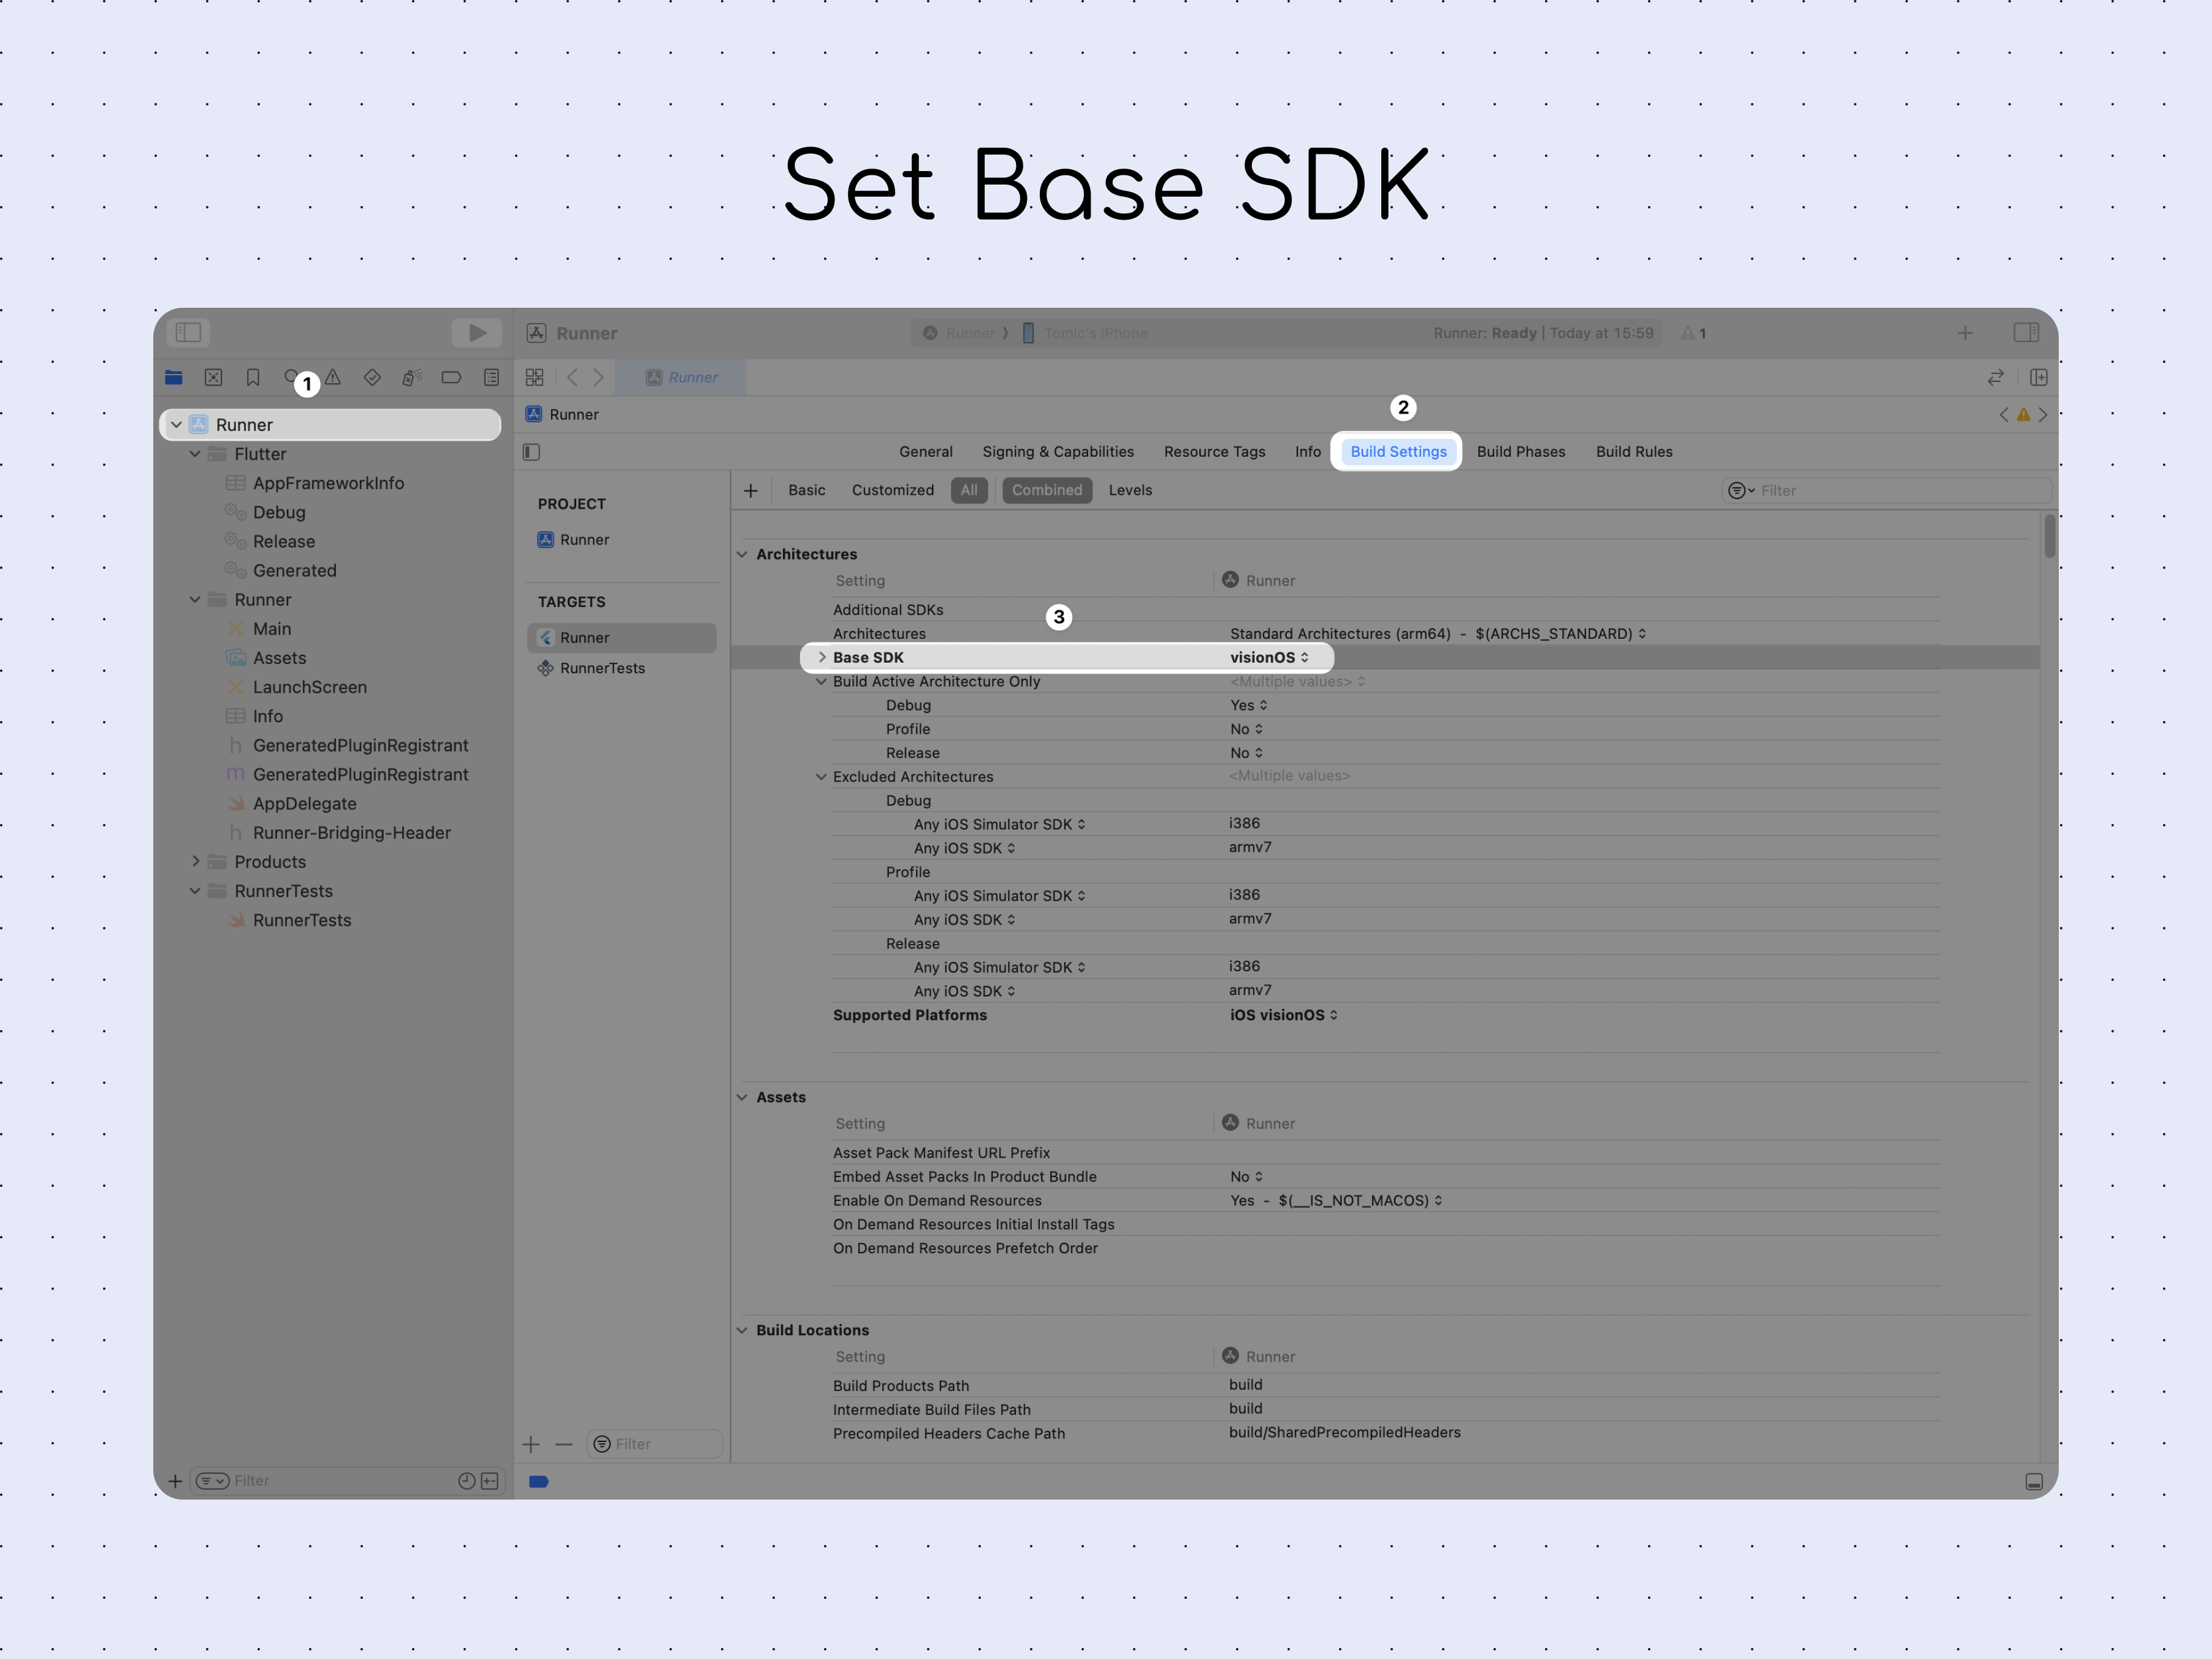
open ios/Runner.xcworkspace/Now we need to set our Base SDK to visionOS. Go to Runner > Build Settings and, under Base SDK, select visionOS.
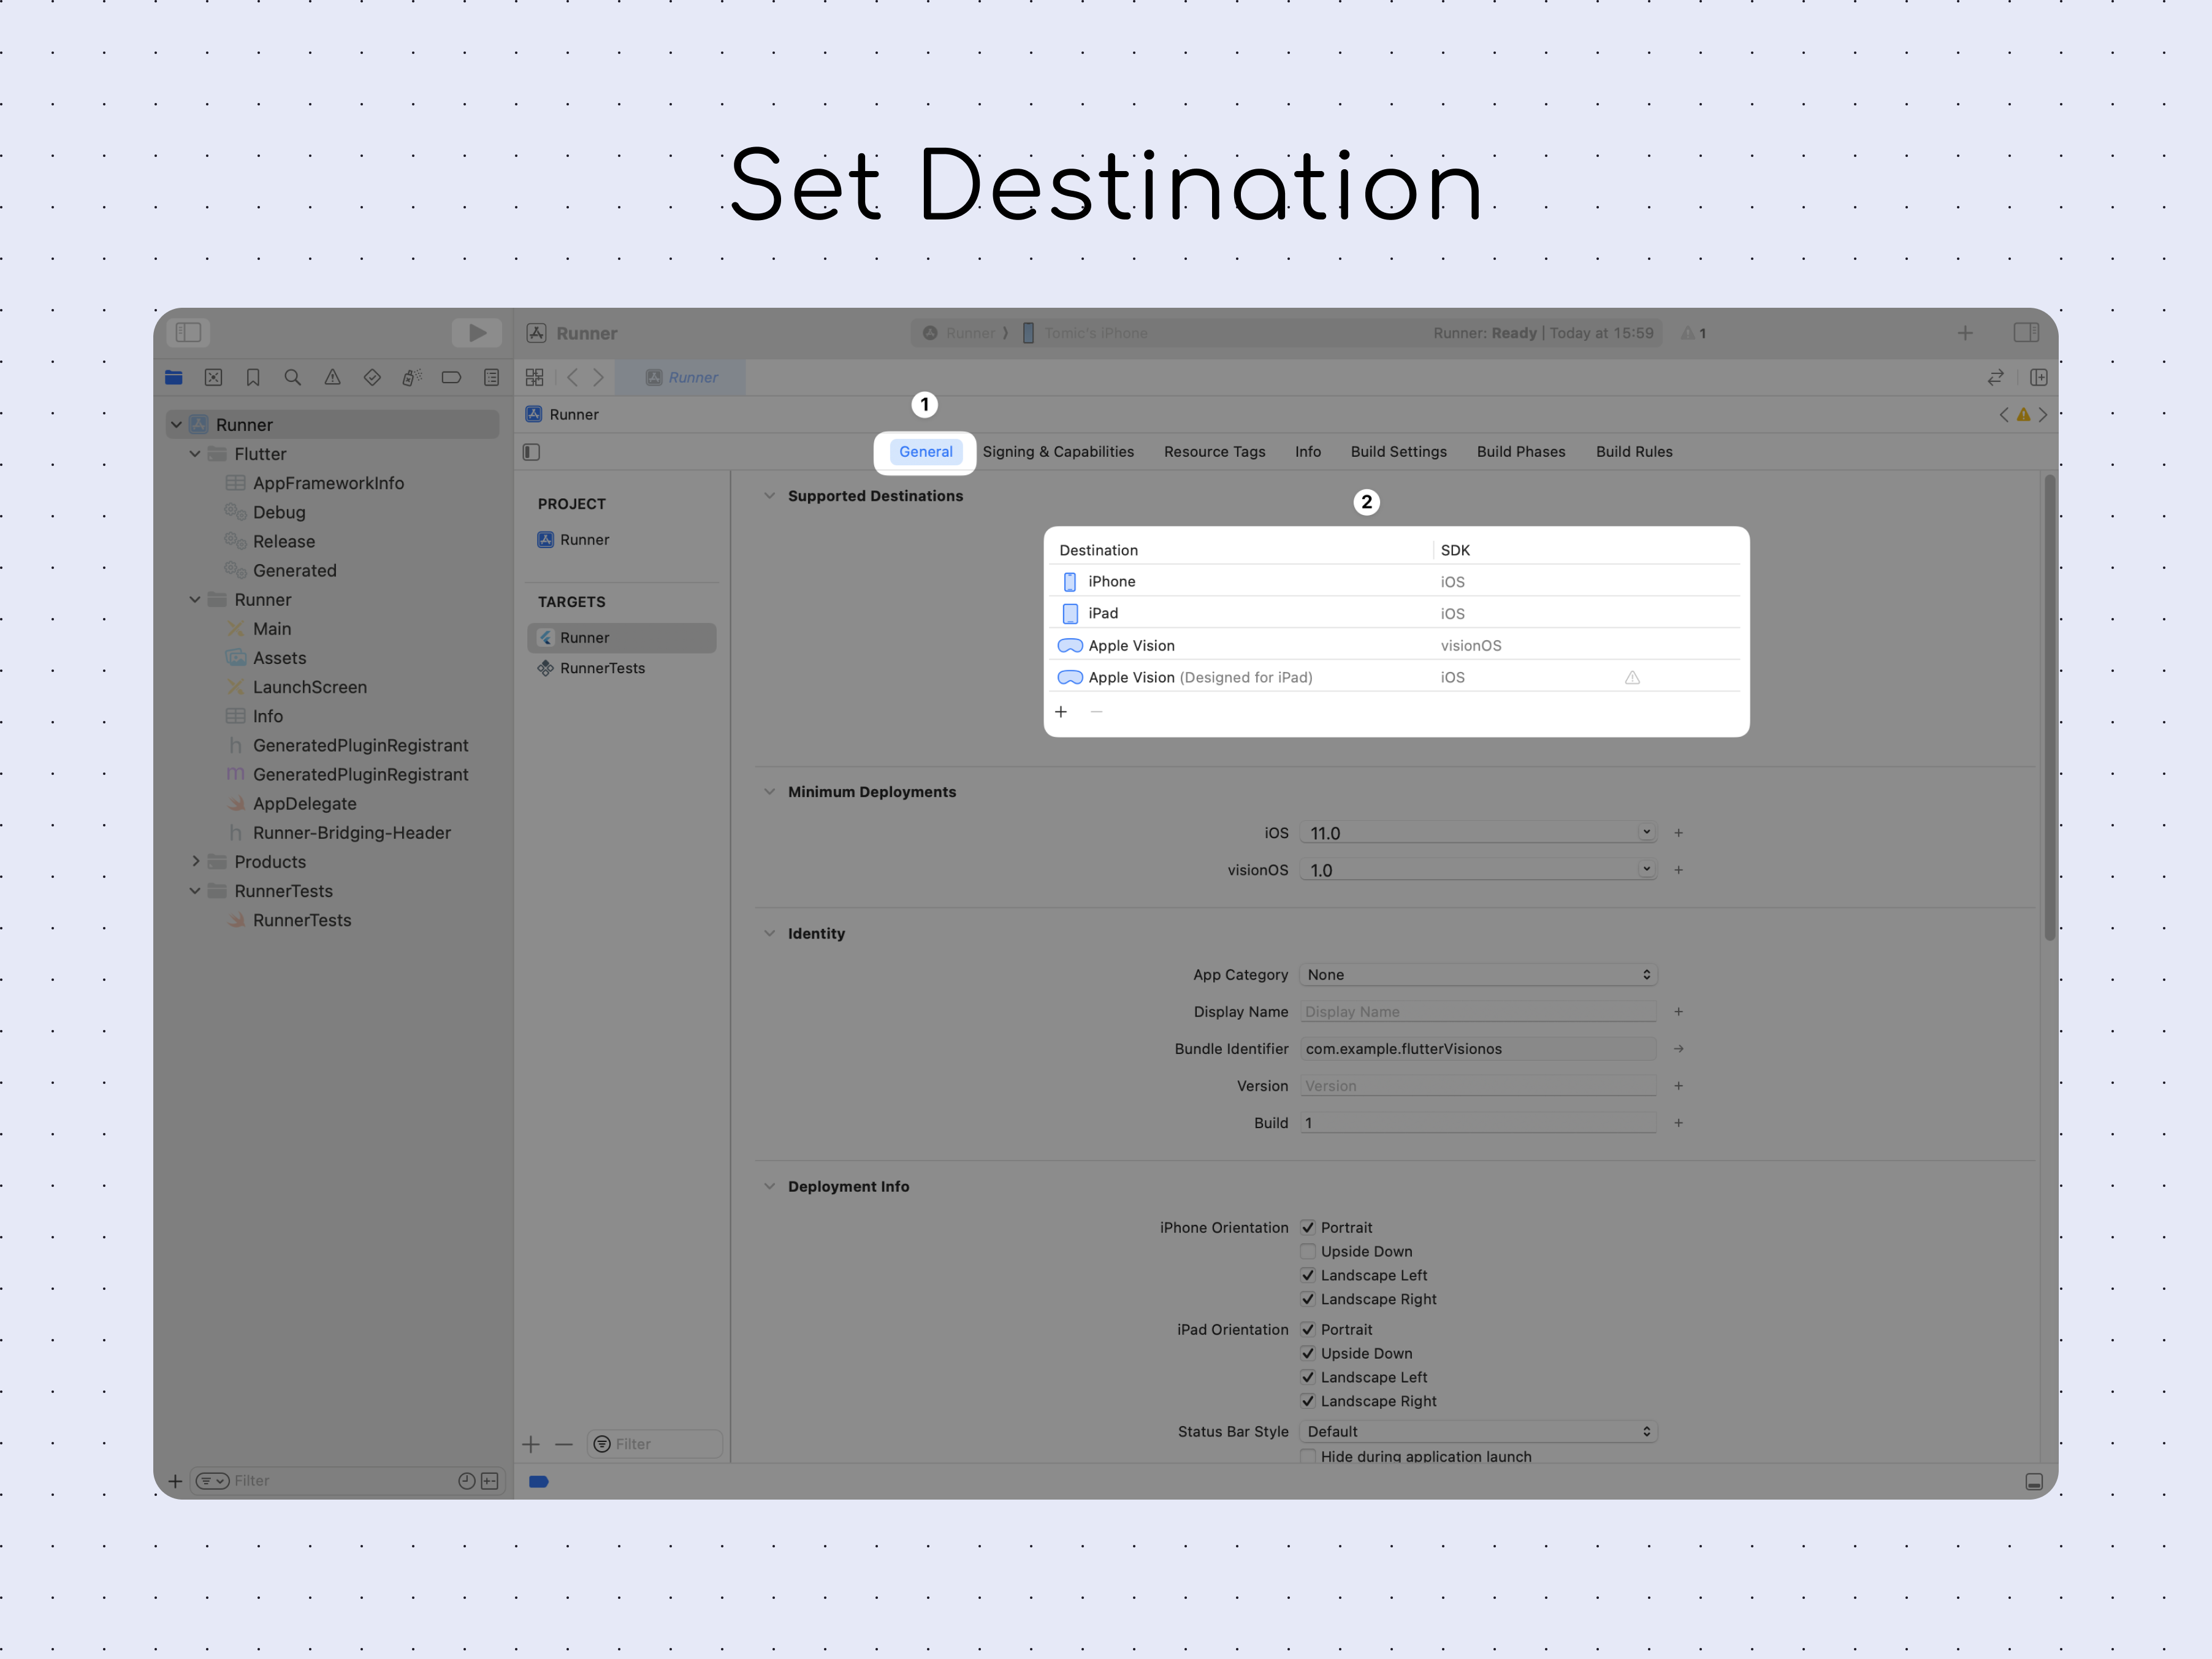
Afterward, stay in Runner, but now navigate to General. Add Apple Vision (normal) and Apple Vision (Designed for iPad) to your Supported Destinations.
Lastly, open the Simulator App. Create a new Simulator by going to File > New Simulator.
Select Apple Vision Pro (At the bottom) as the Device Type, and select visionOS 1.0 as your OS Version.

Launch your Flutter App in Apple Vision Pro
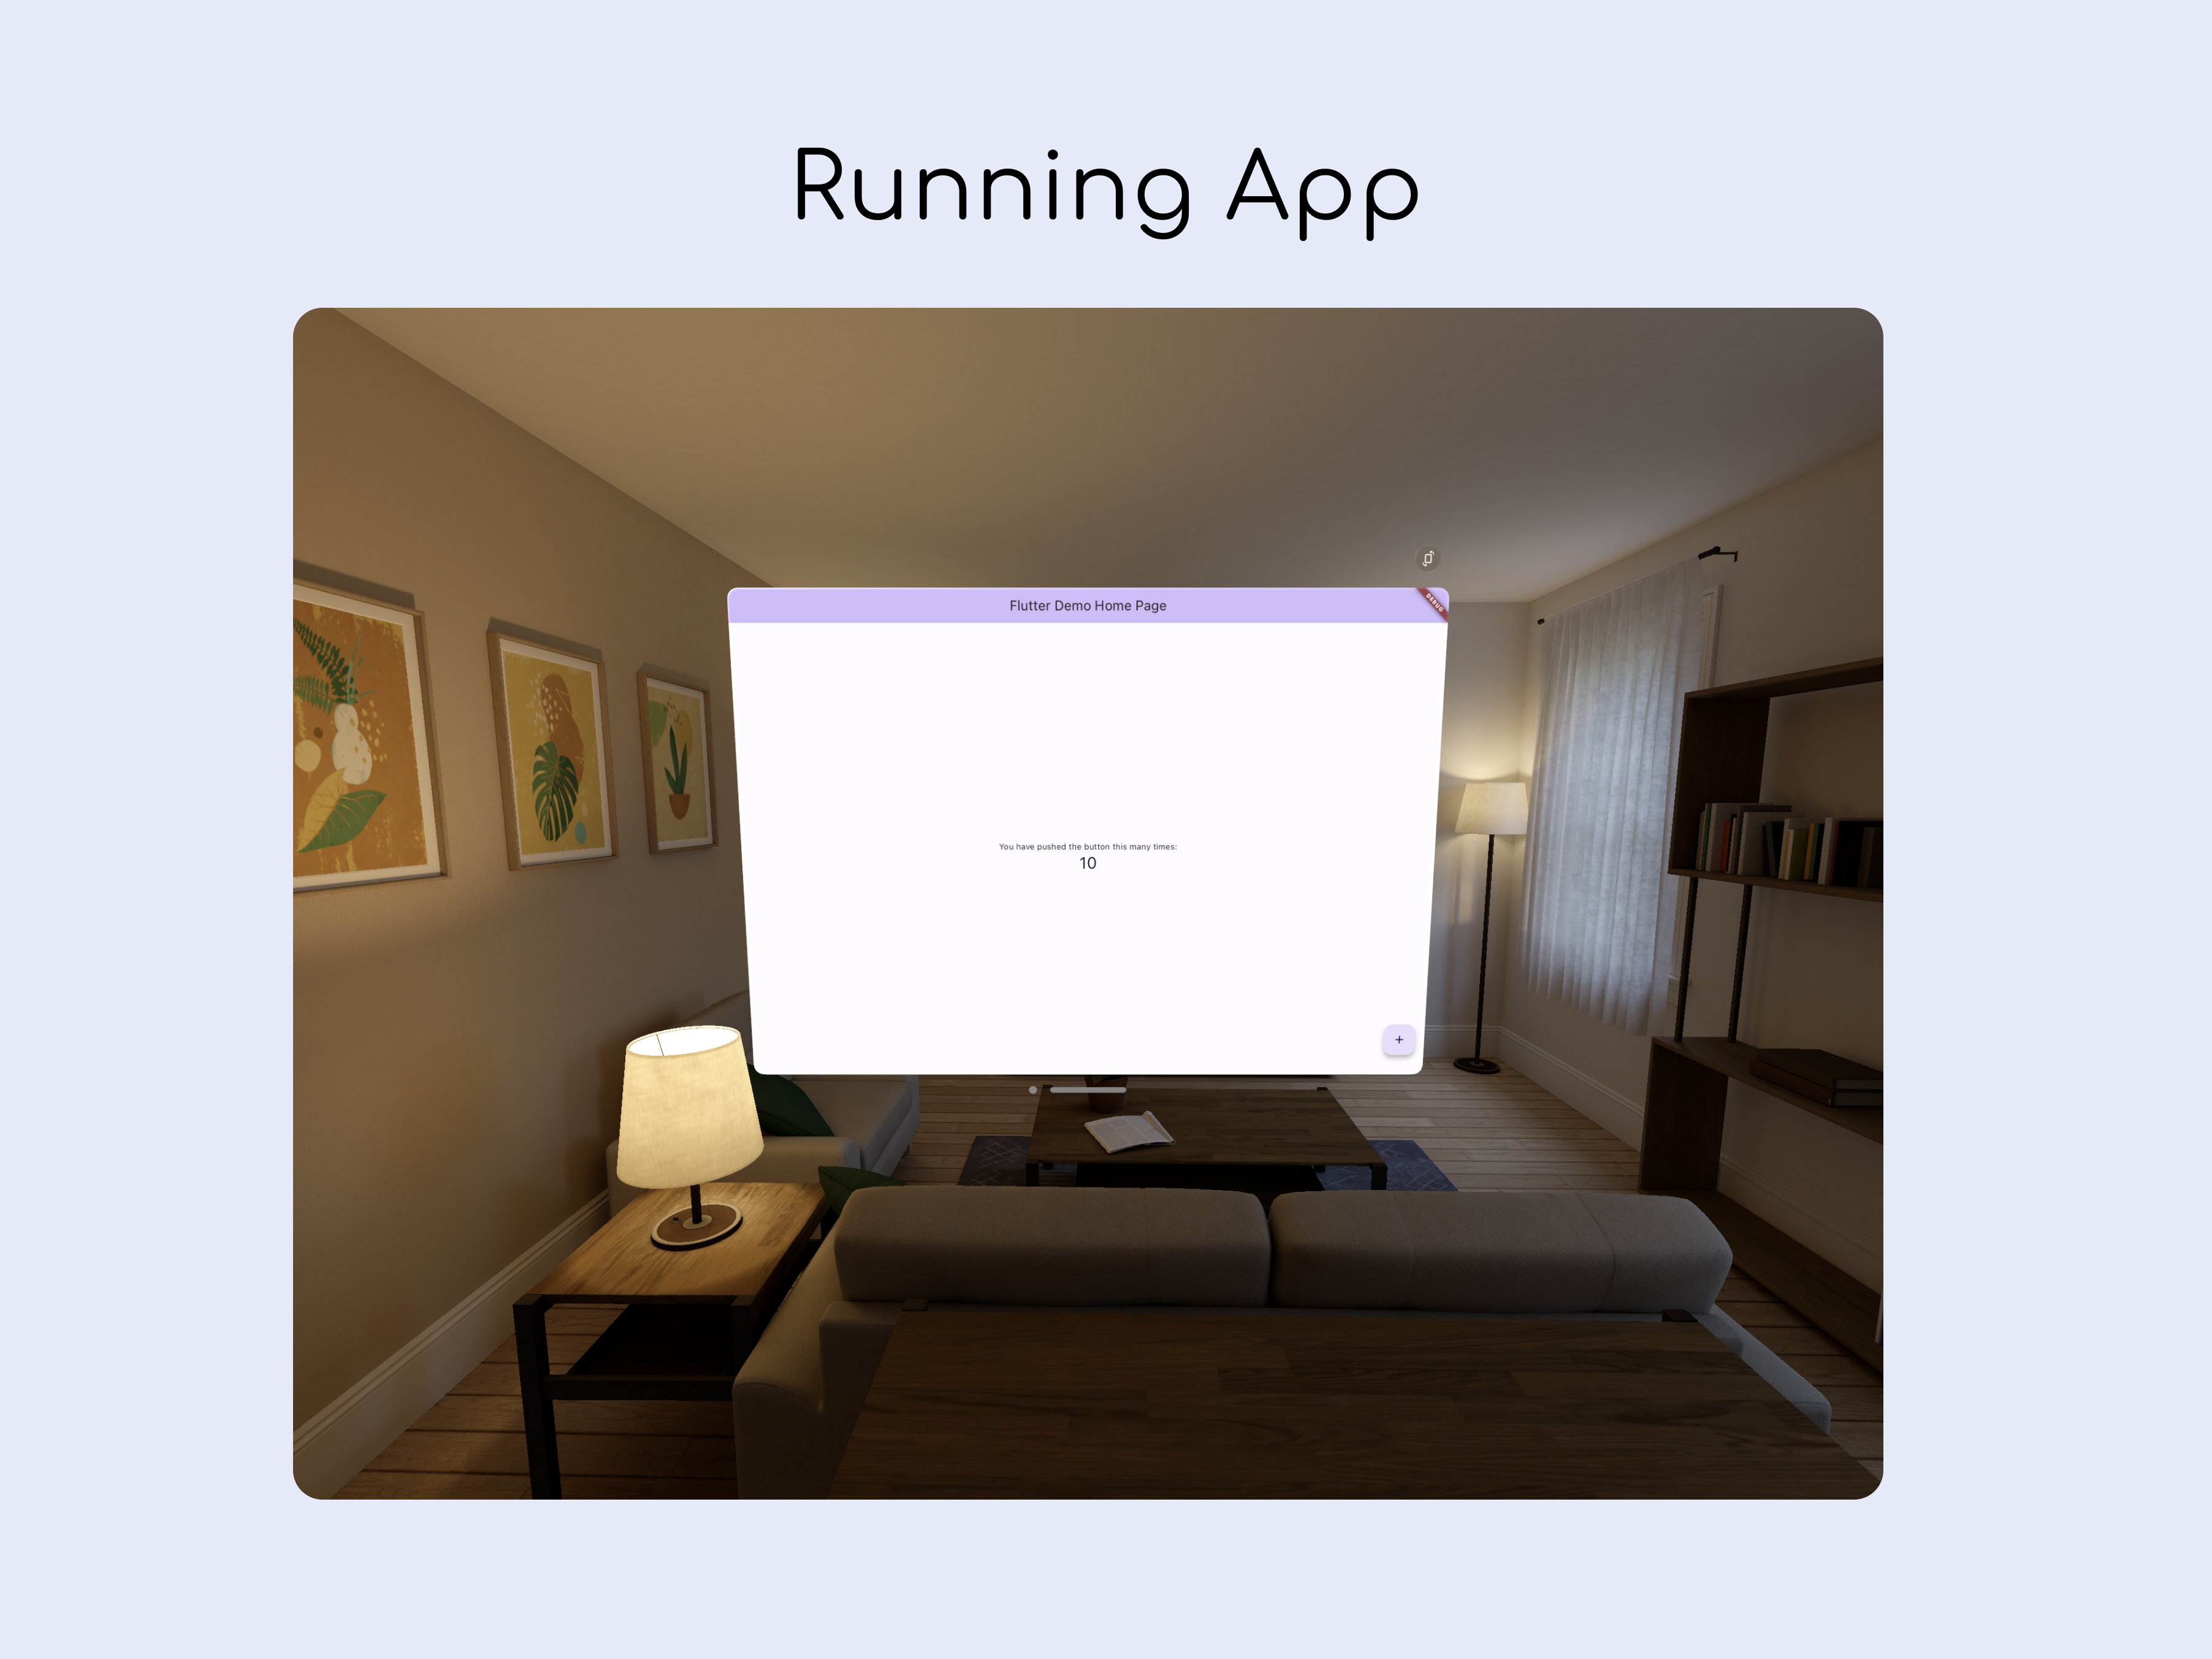
Now you are all set to start your Flutter App in Apple Vision Pro.
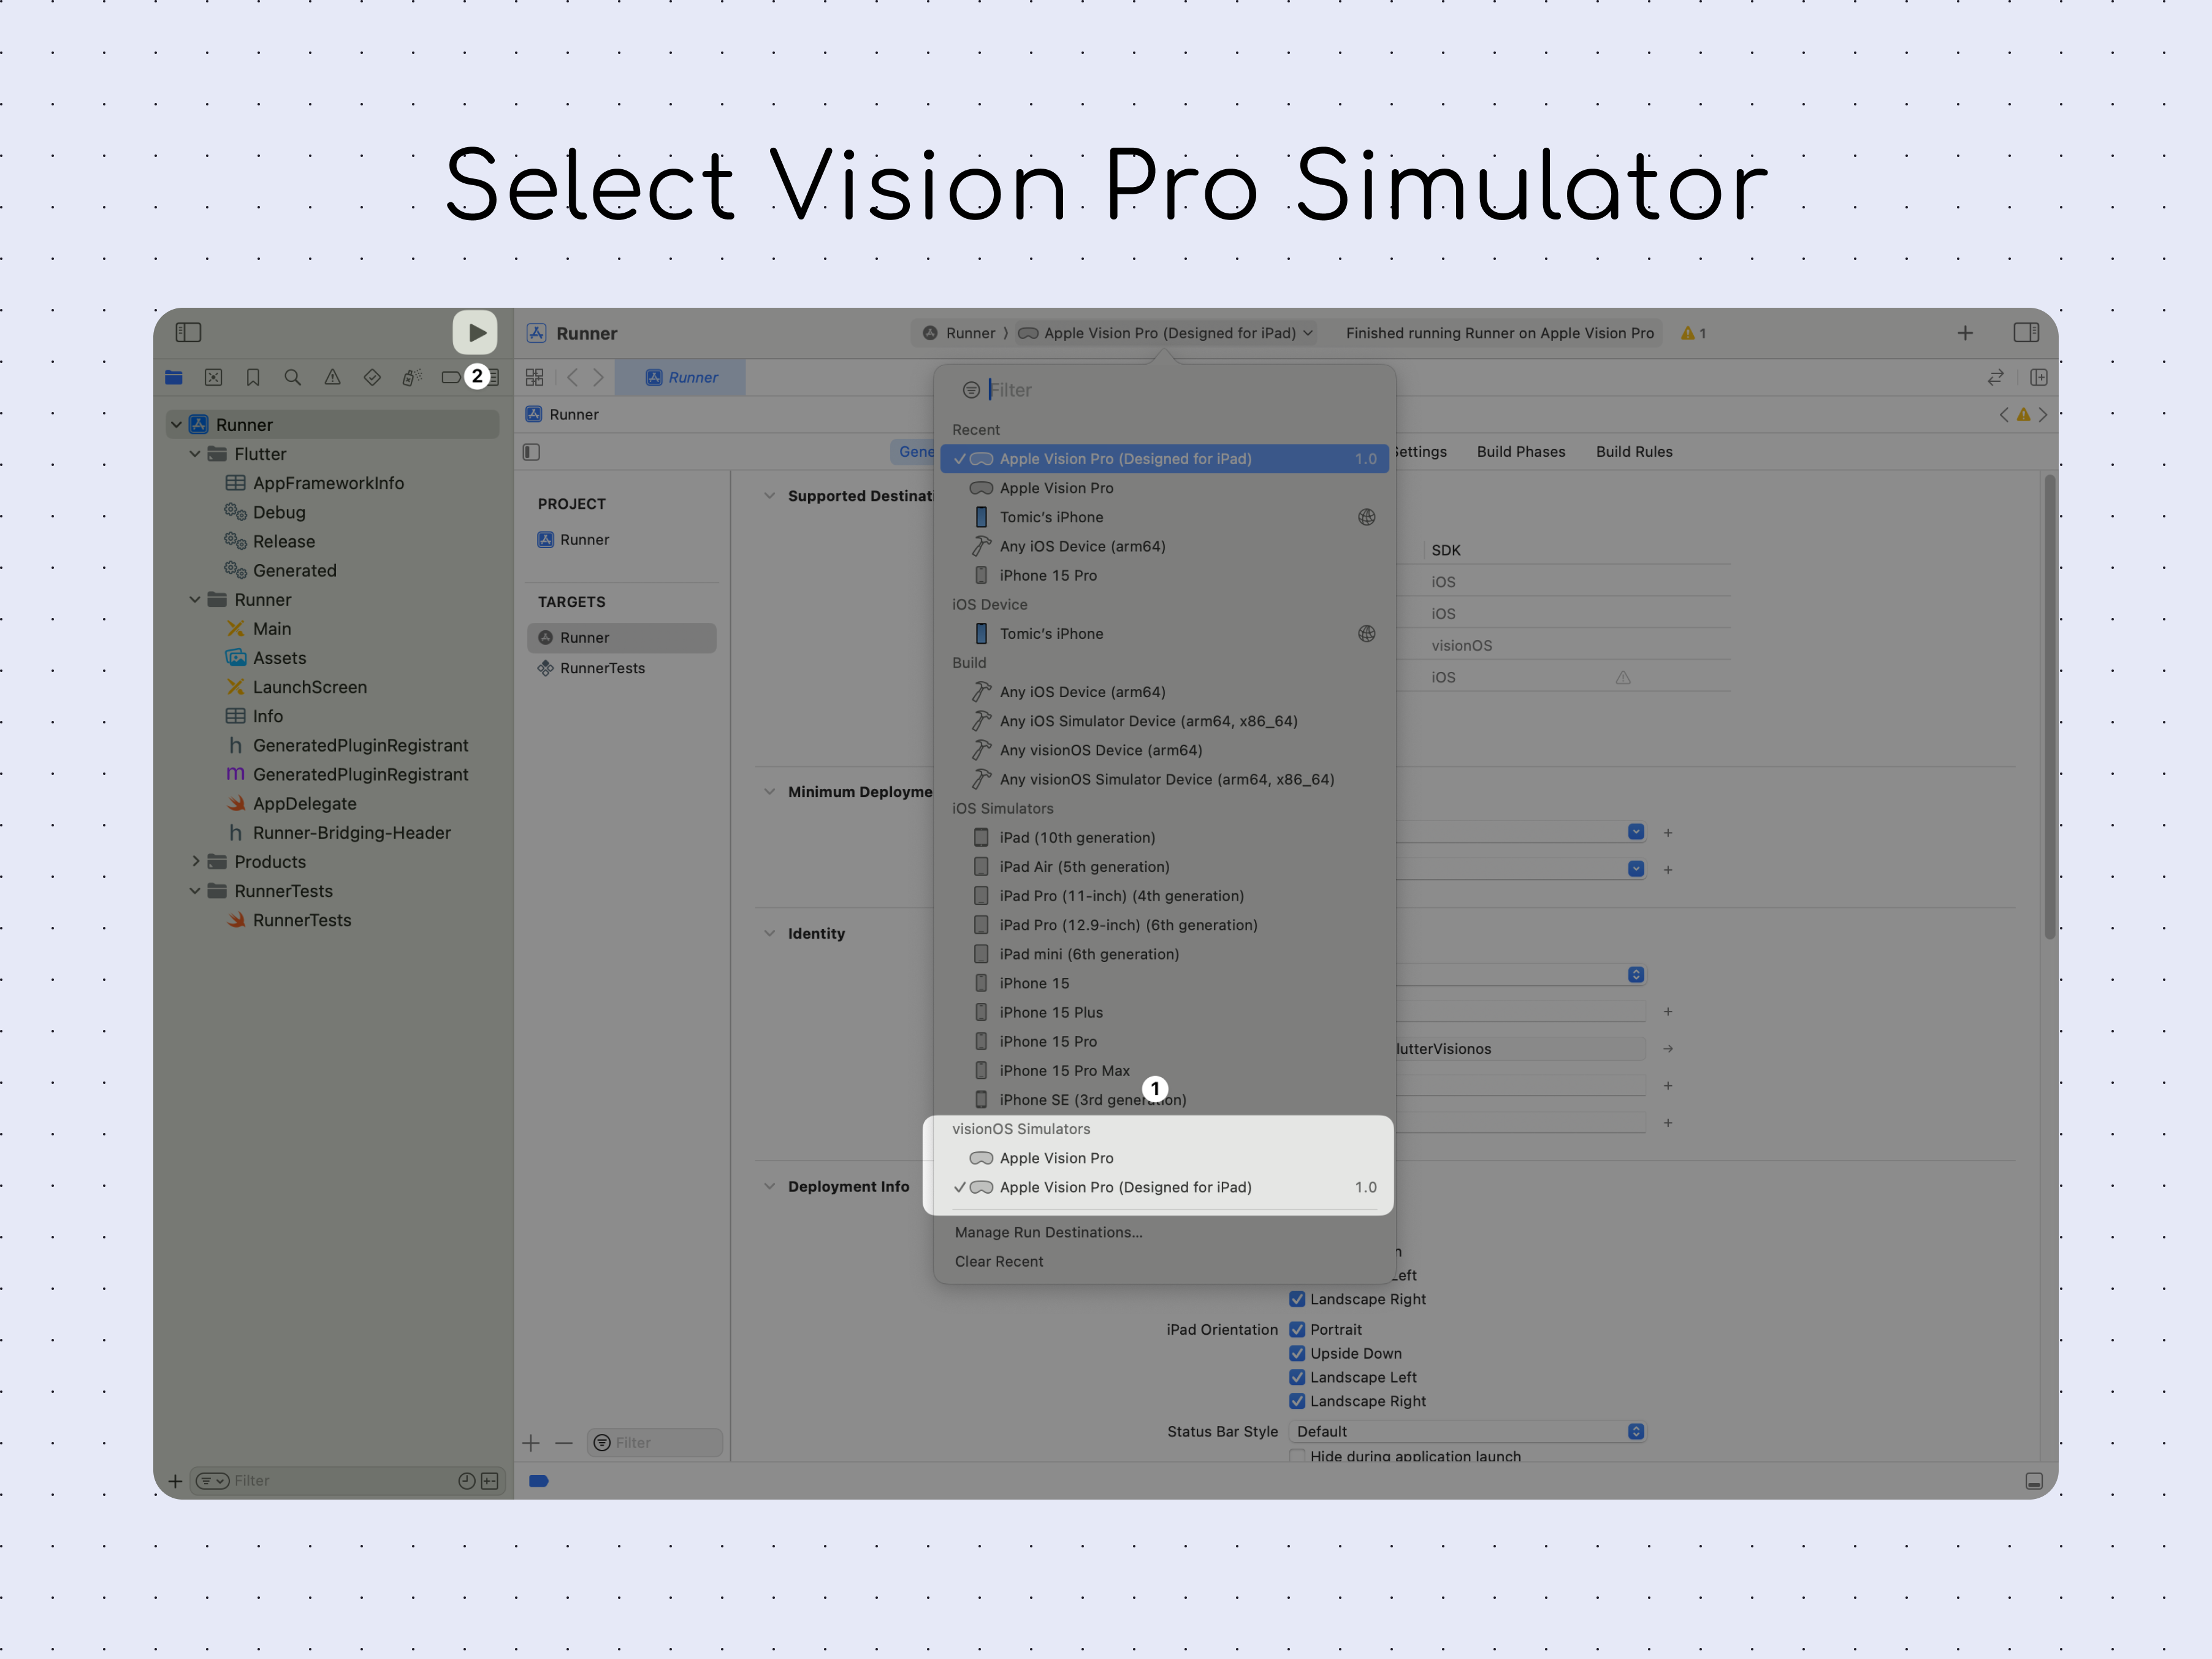
Head to Xcode and Select the Device Apple Vision Pro (Designed for iPad). Run your app.
Congratulations! Your first Flutter App is now running on the Apple Vision Pro!
Conclusion
Thank you so much for reading! If you have any suggestions or questions, just write a comment or contact me via X / Twitter.
I wish you a lot of success developing apps for Apple Vision Pro!
Have a great day!