
Appwrite is a self-hosted backend solution, that gains more and more popularity over the last months. It can be very useful for personal and commercial Apps and provides great features. In this article, you will learn how to use Appwrite and see, that it is one of the easiest to-use backend solutions in Flutter.
Happy reading!
Note: You can find the whole source code provided in this tutorial here
Installation
The first thing we have to do after creating our app is to add appwrite. To do so, we will use the command flutter pub add appwrite. You should be familiar with those commands, otherwise, I recommend you to look up the basics of Flutter again.
But that’s not all. Because Appwrite is a backend solution, we have to download it on our machines. If you use Digital Ocean or Gitpod, just click on the links provided here to do a One-Click Setup.
If you don’t use one of these both, you can install it with Docker. Click here to do so. If you haven’t docker installed yet, you can install it here.
Create Appwrite project
Now, let’s set up an appwrite project. Make sure that your docker CLI is running, so you can access the Appwrite dashboard via localhost. There, click on Create Project. Follow instructions there and click on create. Now we have to add a new Flutter platform to your project. In your project that you have created before, click “Add Platform”. Choose Flutter and add your App credentials.
If you are building your app for different platforms, you have to do some steps for each platform. Here are all the links for that:
Your First Steps & User auth
Let’s start by initializing your SDK. To do so, Import Appwrite and create a new variable of type Client. Now you can set the endpoint and your localhost:

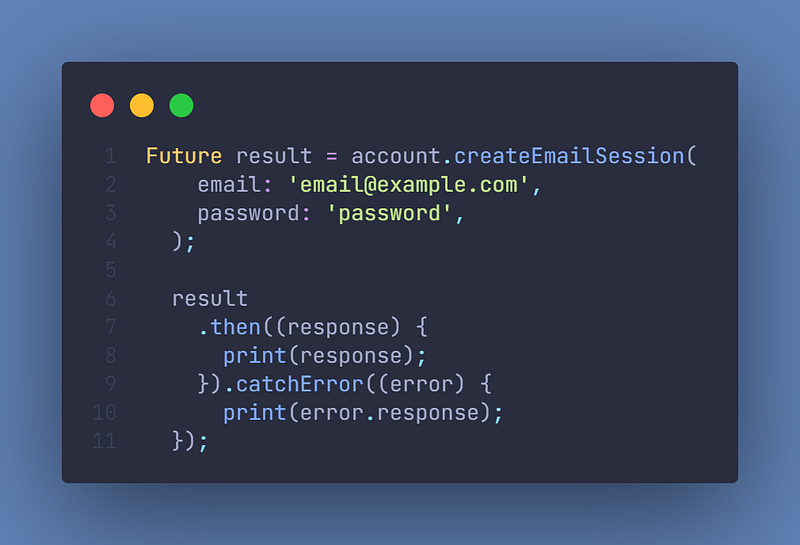
Now, let’s make our first request. We will create an account. To do so, we create a new variable called account and just call .create(). We can specify some things there, that you can get from your own text fields:

But what if we don’t know yet if the user is logged in? That is extremely easy in appwrite:
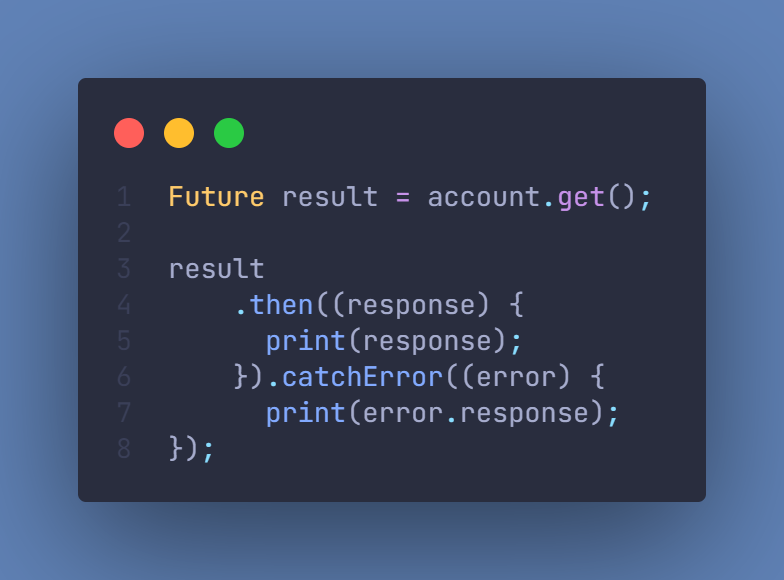
And to sign in if the user already has an account, you can just do the following:
If we want to log out the user, we can just call deleteSession() (Don’t worry, it does not delete the account, just the current session):

But what if you want to delete an account? This is not that simple, because we have to work with the User API (not the Account API). The user API is integrated from the server-side and operates in an admin scope, while the Account API operates in the scope of the currently logged-in user and usually uses a client-side integration. Because appwrite supports server-side Dart SDK code, we can still use our Dart code but have to add the package dart_appwrite:

Using Databases
To create your own Database, head back to your project and navigate to “Database”. Create your database there. Every database is split into collections. You don’t have to create multiple databases for your apps, but it’s recommended for bigger applications. Inside of a collection, you can add different Attributes. In a To-do list application, it’s for example the date, text, and a bool if it’s completed. You don’t have to specify the UserID there if you set your permissions to “Document Level” in the Settings of your collection. In addition, you don’t have to worry about an ID, because Appwrite automatically assigns IDs (without any attribute you have specified).
But now, we want to get the database entries of course. First, we will list all of the documents:
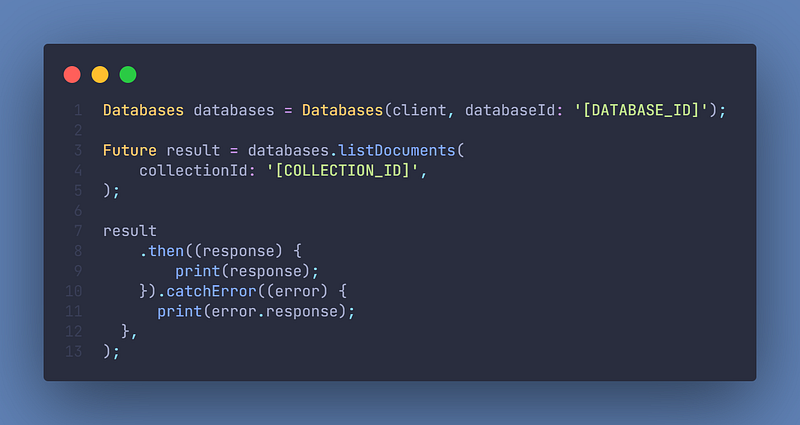
You can get the Collection ID in the Settings of your collection and the Database ID in the Settings of your Database
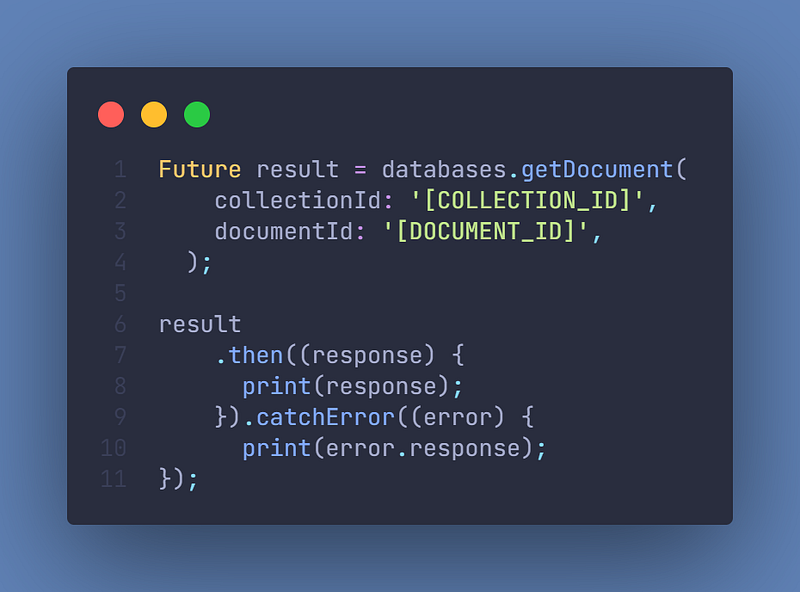
But what if the user clicks on a to-do and wants to access all its information? Then we have to get only one entry. This is also very easy with Appwrite:
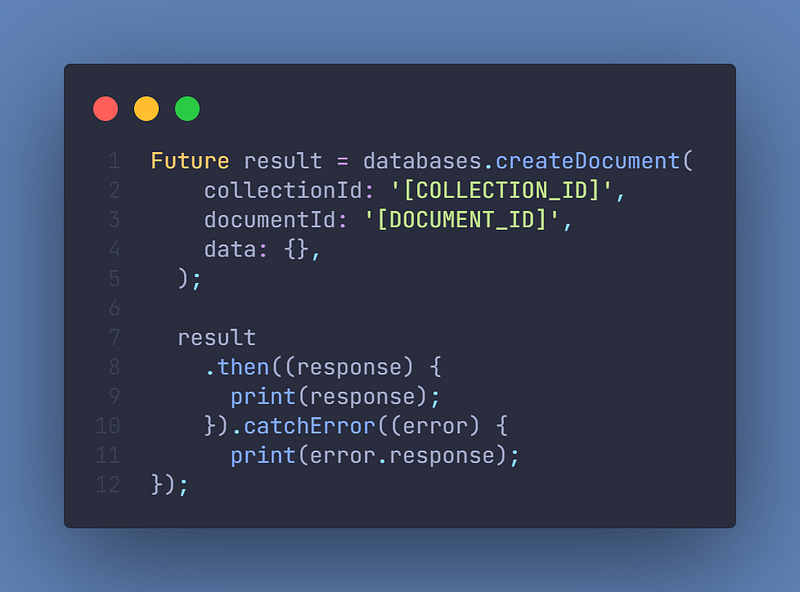
We get all the documents, but the user hasn’t created any document yet. So let’s do this right now:
Further reading & Conclusion
In this article, you have learned the basics of the backend solution “appwrite”. You have seen how helpful it can be and how easy it is to use. In my opinion, Appwrite is the easiest to use backend solution among Firebase, AWS, and Supabase.
You can unfold the whole power of appwrite if you use packages like Freezed, Isar, or Riverpod. If you want to learn these additions, I have entire tutorials about them. Check them out here.
In the following few articles, I will introduce more somewhat complicated packages and explain them. If you don’t want to miss this, I recommend you to follow me. I tried my best to write the easiest tutorial which everyone understands. If you appreciate this work, I would be very grateful if you could support this quality content and give me some claps!
Thanks for reading, have a nice day!
NOTICE: This article is based on the documentation of appwrite package. All the information provided here is from this site and a big part of the source code is taken from the documentation. Appwrite Documentation Source: https://pub.dev/packages/appwrite.