You can use Dart for so many things. One of them is the backend area. That’s why, I will show you today, how to use Dart Frog, a fast and minimalistic backend framework for Dart.
Note: You can find the whole source code provided in this tutorial here
Installation
First, we have to install the dart_frog cli. To do so, we will use the command dart pub global activate dart_frog_cli. You should be familiar with those commands, otherwise, I recommend you to look up the basics of Flutter again. Now you can create a dart_frog project with dart_frog create my_project.
The last thing we have to do is start the dev server. The default port is 8080, but you can specify your custom port with --port option. Navigate to your newly created project and execute dart_frog dev.
Routes
Let’s talk about routes first. Routes are very important because they determine under which endpoint you can access data. For example, if you create a file in routes folder called api.dart, you will have an endpoint under /api. It’s also possible to use dynamic routes. For example, you can create a file in routes/pages called [id] and it will be accessible under /pages/1 and /pages/2… Okay, but how do we return data? First, we have to import dart_frog in api.dart file. After that, we create a function onRequest (This function will be called once we open <your_url>/api that returns Response object:
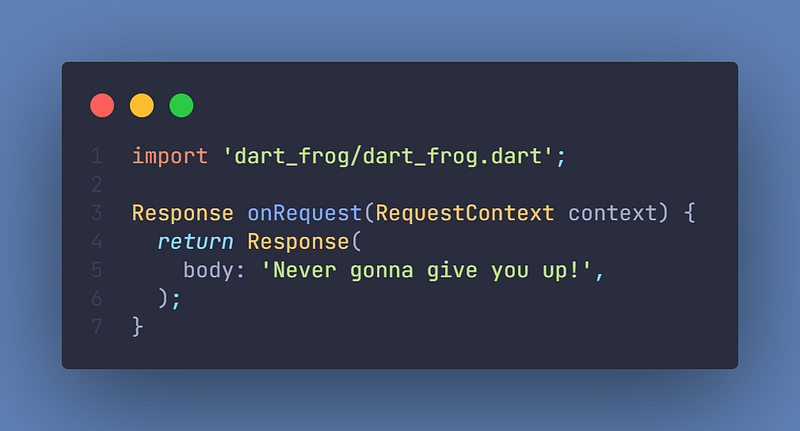
But wait, why do we have a RequestContext there? With that, you can access the incoming request and dependencies provided by the request context. We will dive deeper into that in “Middleware”.
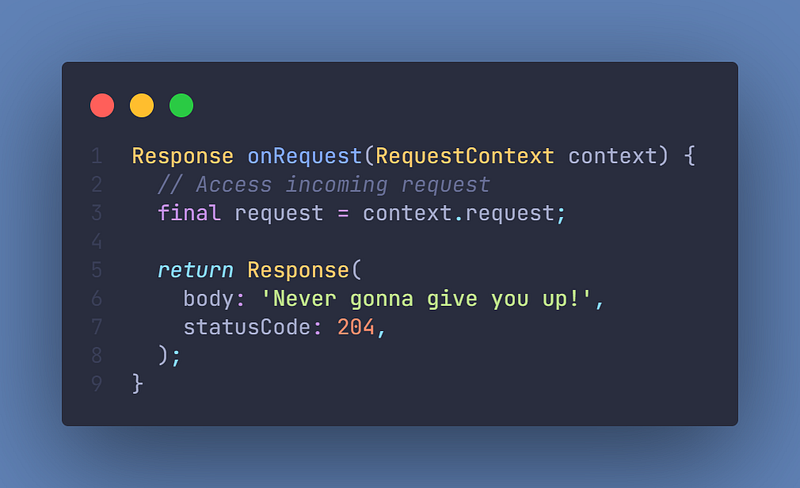
As you can see, you can easily access the incoming request, but you can also return a status code. Pretty cool, right?
But what if we want to return a JSON response in combination with a Future?
To return a JSON (you don’t necessarily need futures) you can use return Response.json(). And using futures is as simple as in every other function in Dart. Just add async keyword and return a Future<Response>:

Middleware
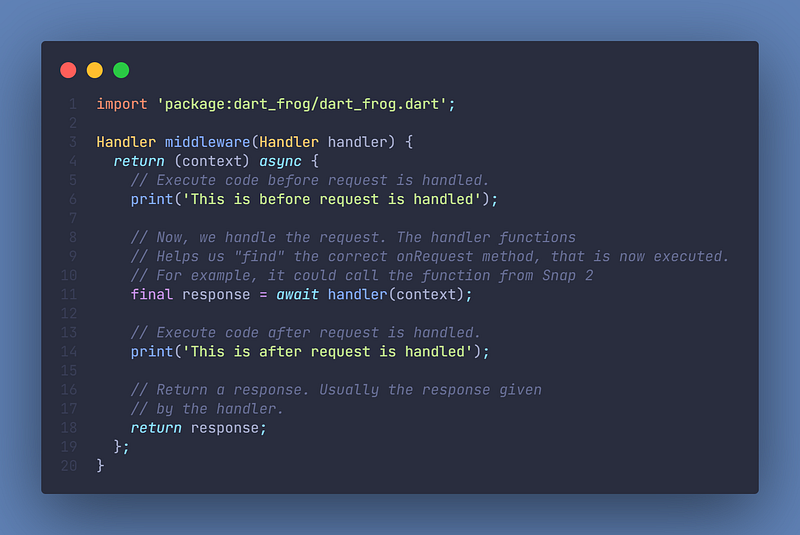
Let’s talk about Middleware. It allows you to execute code before and after a request is processed. This can be useful if you want to validate authorization, logging, and much more. But what do we need for middleware to work? We need a middleware function in a file called _middleware.dart within a subdirectory of the routes folder. For example, routes/_middleware.dart is the middleware for all inbound requests, but routes/api/_middleware.dart is the middleware for all inbound requests under /api. But attention: There can only be one piece of middleware per route directory!
Now, let’s get to coding. Import dart_frog again and create a function called middleware that returns Handler object. Let’s just see it in action:
There is build-in middleware, such as requestLogger. This allows us to log all requests to our server if we have created our middleware in routes/_middleware.dart or we can log all requests to our api route if we have created our middleware in routes/api/_middleware.dart:

Dependency Injection, Testing & more
I could write about way more things because dart frog has so many features, but the article would get way too big. That’s why I will provide links here if you want to use these things:
A little bit more advanced:
Create a Production Build
It’s effortless to create a production build with Dart Frog. you just have to run dart_frog build, which creates a production build that includes a Dockerfile. This makes it very easy to deploy your Dart Frog anywhere.
Further reading & Conclusion
In this article, you have learned the basics of the backend solution “dart_frog”. You have seen how easy it is to use and.
There are many more great articles out there, such as Freezed, Isar, or Riverpod. If you want to learn these additions, I have entire tutorials about them. Check them out here.
In the following few articles, I will introduce more somewhat complicated packages and explain them. If you don’t want to miss this, I recommend you follow me. I tried my best to write the most straightforward tutorial which everyone understands. If you appreciate this work, I would be very grateful if you could support this quality content and give me some claps!
Thanks for reading, have a nice day!
NOTICE: This article is based on the documentation of the Dart Frog package. All the information provided here is from this site and a big part of the source code is taken and sometimes slightly modified from the documentation. Documentation Source: https://dartfrog.vgv.dev/