Testing is an area in programming, that is very important, but no one really likes it. We still have to learn it, and that’s why I will show you, how to test in Flutter. We will take a look at Unit Testing, Widget Testing, and Integration Testing. In the second part of this article, we will work with mockito to write tests for more complex apps. If you don’t want to miss this part, I recommend you follow me.
Anyways, let’s get started!
Happy reading!
Setup
The first thing we have to do after creating our app is to replace the main.dart with this code and create a new file called counter.dart and paste this code to follow along with this “tutorial”. Now, let’s navigate to our “test” folder and remove everything that is in the main function of widget_test.dart.
Unit Testing
Now we create a file, that we will call unit_test.dart. Every testing file should end with test.dart, so that Flutter knows, that this is a test file.
Okay, now let’s import the flutter_test package and our counter.dart as well as create a main function. Inside this, we will test our app:

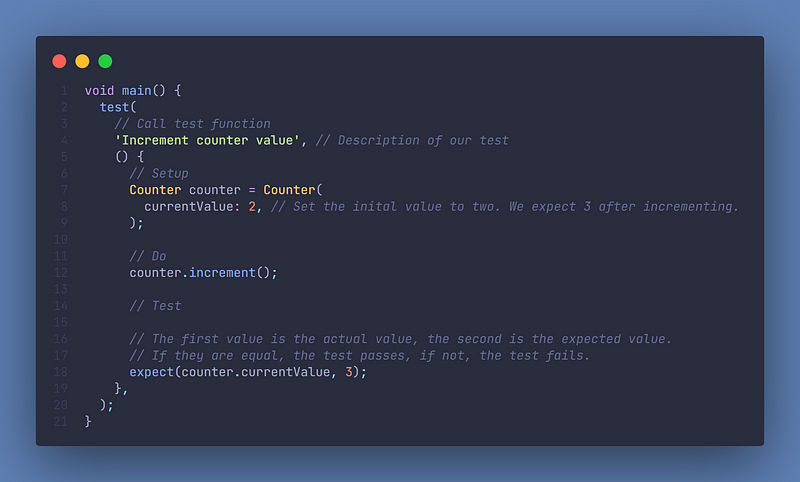
Okay, let’s write our first test. To do so, we will call test(), which takes two arguments. The first thing describes what you want to test and the second one is a function, that executes the test. Inside the test (function), we want to do three things: Setup, Do and Test.
So what does that mean? Well Setup means, that we will create a variable of type Counter().
Do means, that we will increment our value (This test tests, if our value increments), and Test means if we get the expected result. So let’s do this right away:
How to run Tests
Now that we have written our first test, we want to run a test. To do so, click in VSCode on the right side on “Testing” or use CTRL/CMD + SHIFT + P and type “Testing”. Now you can click on “Debug test” in test/unit_test.dart. After running the test, you should see a checkmark if everything passed, if not, you will see a cross and can jump to the error.
Finishing Unit Tests
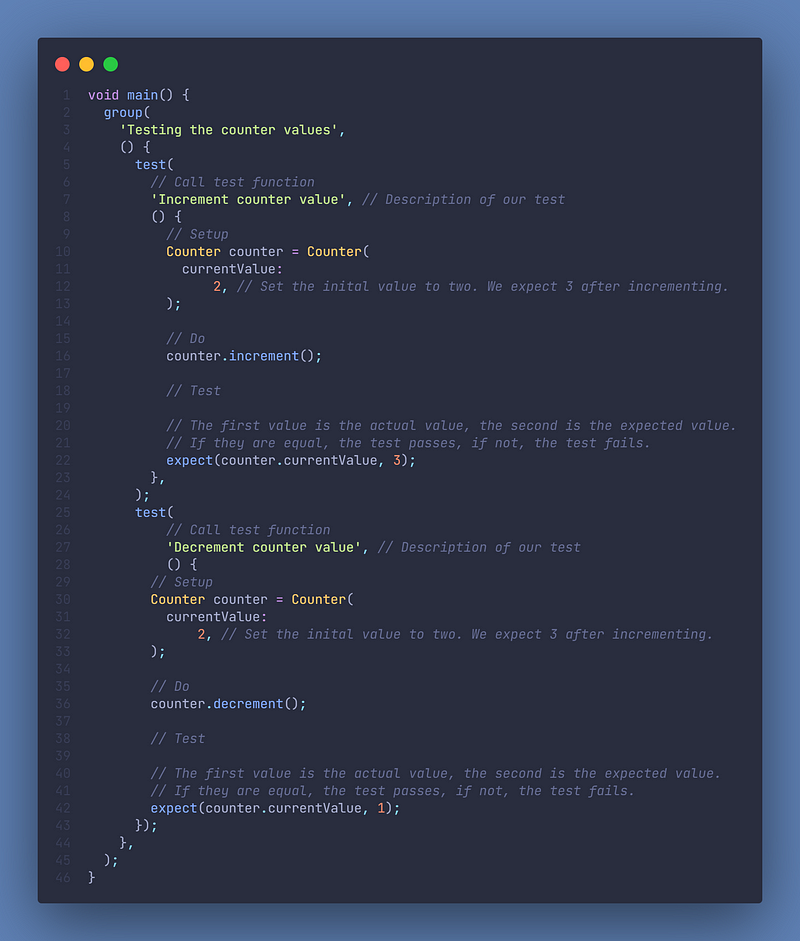
Okay, now we have done the testing for increment. It’s now your task to do the same for decrement.
Done? Here is the solution:

We can also group our tests with the group() function. It takes two arguments, a description of the group (e.g. testing counter values) and a function, where you copy-paste your tests from before. Now you can see in the Testing tap the group and if you click on the little arrow, you will see both tests inside of it:
Widget Tests
Now let’s talk about Widget Testing. We will also import flutter_test, but this time additionally flutter/material.dart and our main.dart. In addition to that, we create a main() function.
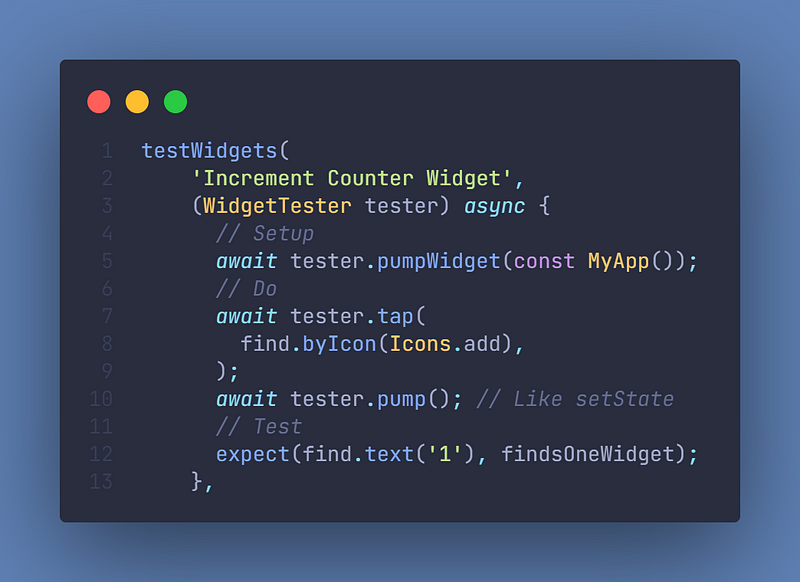
That’s pretty basic stuff. Now we want to test our Widget. For that, we don’t call test, but we call testWidget, which takes two arguments: A description and a function. To the function we pass an WidgetTester tester argument and give it the async keyword:
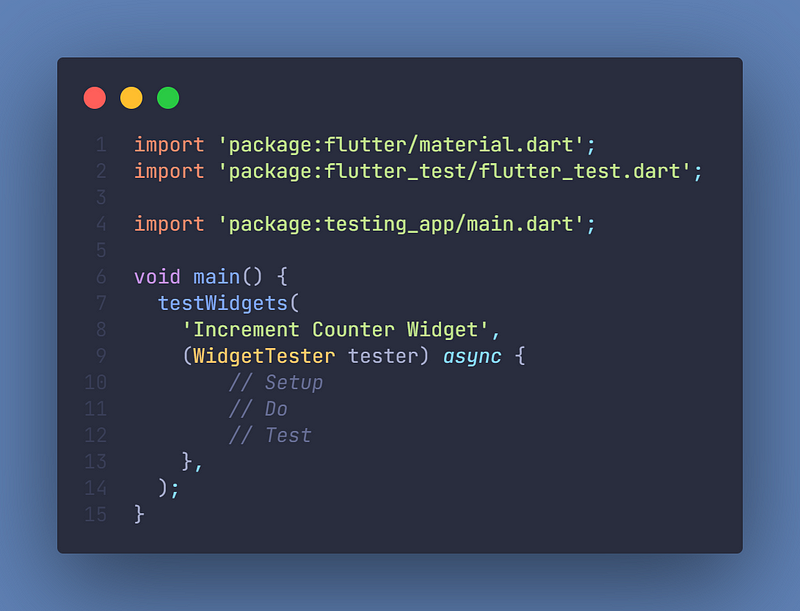
As you can see, we will do the same steps again. Setup, Do, and Test.
In Setup, we will call await tester.pumpWidget(const MyApp());, which will create a widget for the test. For simplicity, we just use the whole app.
Now we want to do something. More specifically, we want to press the add button. For that, we have to call tester.tap() and give it a Widget. But we first have to find the widget with find. There are several ways to find widgets, we will find them by Icon with byIcon(). After doing that, we will call tester.pump(). You can imagine this as the setState of tests.
The last step is test if we get our expected output. We expect to find one Widget that has a text 1:
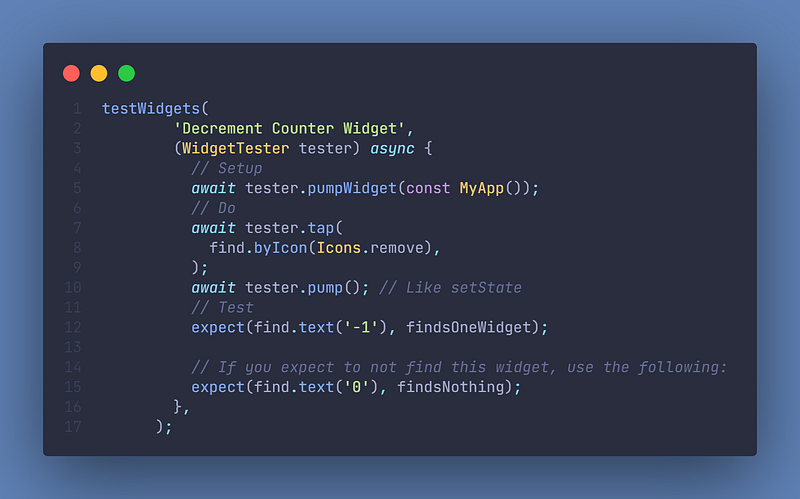
If we now run our test, it should work. Your task is now to do the same for decrement.
This would be the solution:
Further reading & Conclusion
In this article, you have learned the basics of testing in Flutter. You have seen that it’s not that hard if done properly and is actually quite interesting.
Packages like Freezed, Isar, and Riverpod are great examples of packages, that enhance your development workflow and are easy to test. If you want to learn these additions, I have entire tutorials about them. Check them out here.
In the following few articles, I will talk about Integration Testing and other advanced things in testing. If you don’t want to miss this, I recommend you to follow me. I tried my best to write the easiest tutorial which everyone understands. If you appreciate this work, I would be very grateful if you could support this quality content and give me some claps!
Thanks for reading, have a nice day!