
Background Icon Source: https://apple.fandom.com/wiki/ARKit
Ever wanted to use AR in Flutter apps? Well, ARKit can help you. It’s a package which is very easy to use as soon as you understood how it works. That’s why I will introduce you today into that package! Let’s get started!
Attention: ARKit is only available for iOS devices (Because ARKit was developed by Apple). For android devices, you can use ar_core_flutter_plugin. I will create a crash course on that soon.
Happy reading!
Installation
The first thing we have to do after creating our app is to add arkit_plugin. To do so, we will use the command flutter pub add arkit_plugin. You should be familiar with those commands, otherwise, I recommend you to look up the basics of Flutter again.
Now, let’s configure some files to use ARKit on iOS devices.
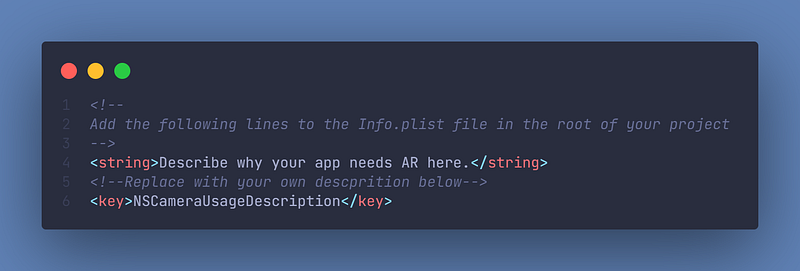
First, allow your app to use the camera. For that we have to provide a NSCameraUsageDescription:
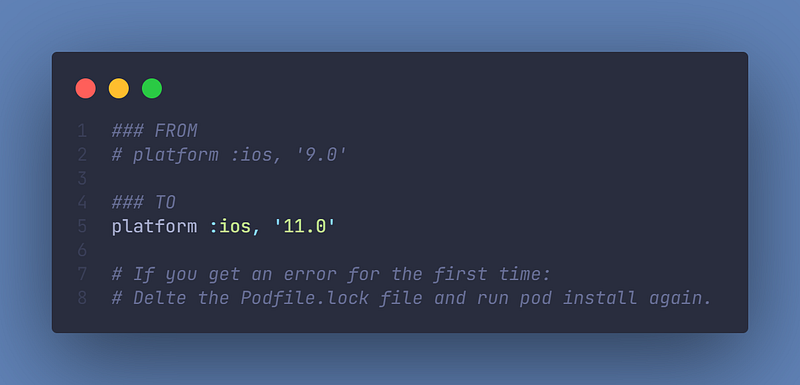
After that, we have to update the Podfile. The minimum supported iOS version is 11.0, but use 11.3 if you needd to use image anchors. For image tracking configuration or face tracking set it to 12.0 and the minimum version for body tracking is 13.0.
Using ARKit
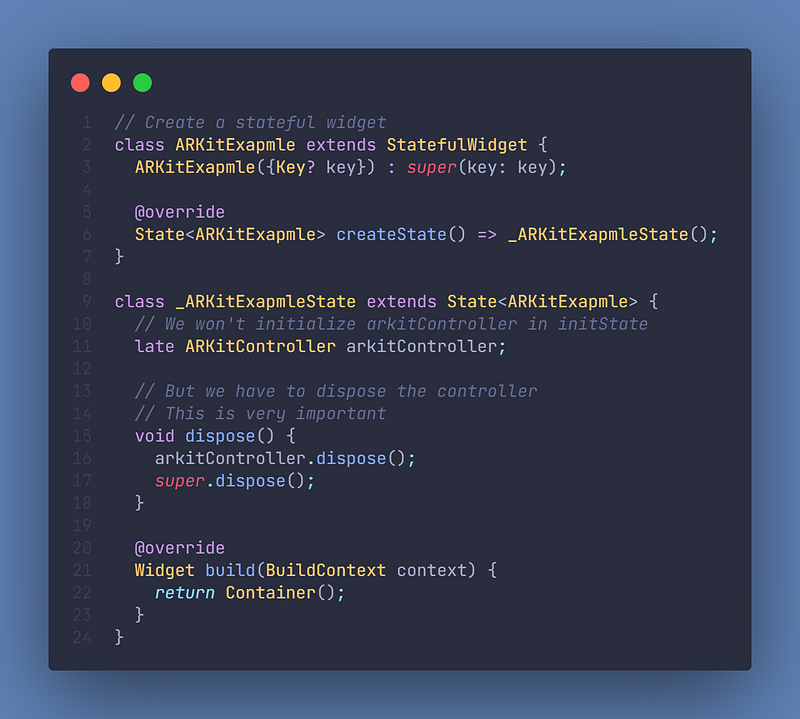
First, we have to create an ARitController in a StatefulWidget.
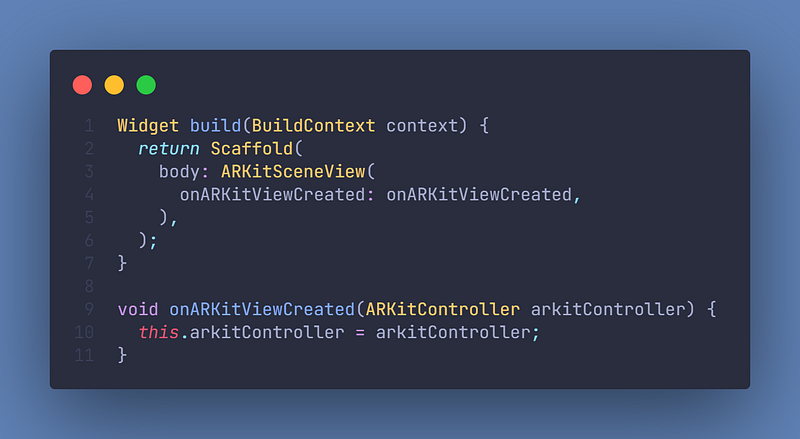
Now, let’s create our ARKit View. For that, we will use the ARKitSceneView. It has a property called onARKitViewCreated. We can call a function there and initialize our arkitController:
But currently, we can’t see anything. Let’s add a FloatingActionButton that calls a function to add one object to the arkitController.

There are many more customization options for ARKitNode, which you can find here.
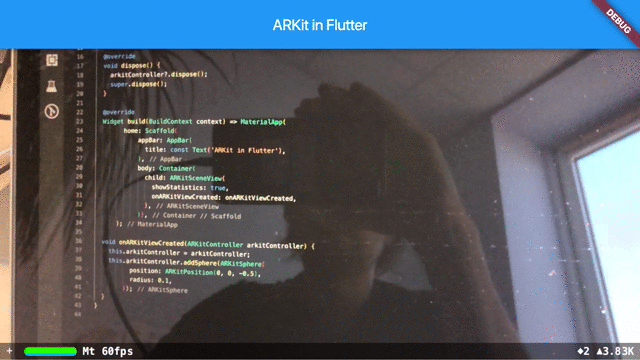
ARKit could now look like this:
It’s highly recommended to take a look at the examples of ARKit. You can learn there, how to add your own images on top of the nodes, use custom light settings, track faces, bodys and other. There is so much to discover, so take a look at this list and check out what you like. You can literally do anything with ARKit.
Before going to the App Store
Advice by the developer:
The plugin supports TrueDepth API. In case you didn’t use it, your app will be rejected by Apple. Hence you need to remove any TrueDepth functionality by modifying your
*Podfile*file

Further reading & Conclusion
In this article, you have learned the basics of the AR package “ARKit”. You have seen how easy it is to use and how powerful it is.
You can unfold the whole power of ARKit if you use packages like Freezed, Isar or Flutter Hooks. If you want to learn these additions, I have entire tutorials about them. Check them out here.
In the following few articles, I will introduce more somewhat complicated packages and explain them. If you don’t want to miss this, I recommend you to follow me. I tried my best to write the easiest tutorial which everyone understands. If you appreciate this work, I would be very grateful if you could support this quality content and give me some claps!
Thanks for reading, have a nice day!