
Supabase is a backend solution, that considers itself as the open-source Firebase alternative. It already gained some popularity among developers, mainly because of the wide range of supported languages and because it can be very useful for personal and commercial Apps. In this article, you will learn how to use Supabase in Flutter. Let’s get started!
Happy reading!
Note: You can find the whole source code provided in this tutorial here
Installation
The first thing we have to do after creating our app is to add supabase to our pubspec.yaml. To do so, we will use the command flutter pub add supabase_flutter.
Create Supabase project
Now, let’s set up a supabase project. Go to supabase.com. There, click on Start your project. Follow the instructions there and click on create.
In your project dashboard, go to Settings and then to API. Copy your Project URL and the Anon key there. We will need this for the next step.
Your First Steps & User auth
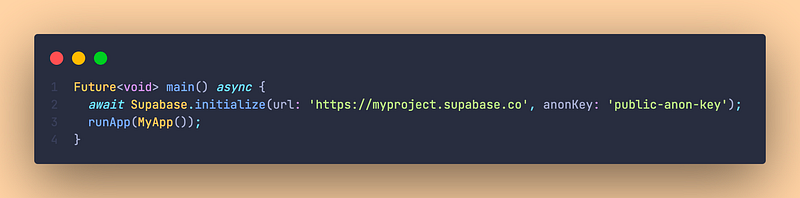
Let’s start by initializing your Flutter App. To do so, Import Supabase and initialize it with Supabase.initialize:
But to access the Supabase client, you have to write the following line:
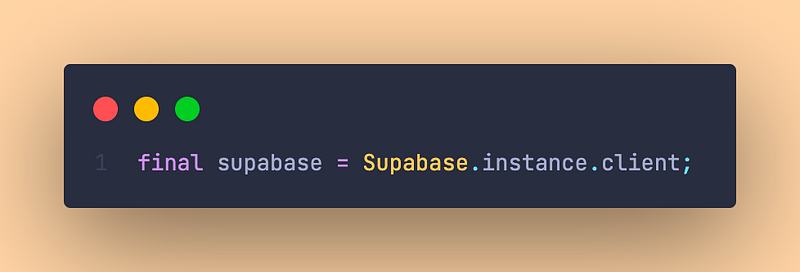
My personal tip: Store it in a provider (If you are using provider or riverpod) to easily access it everywhere.
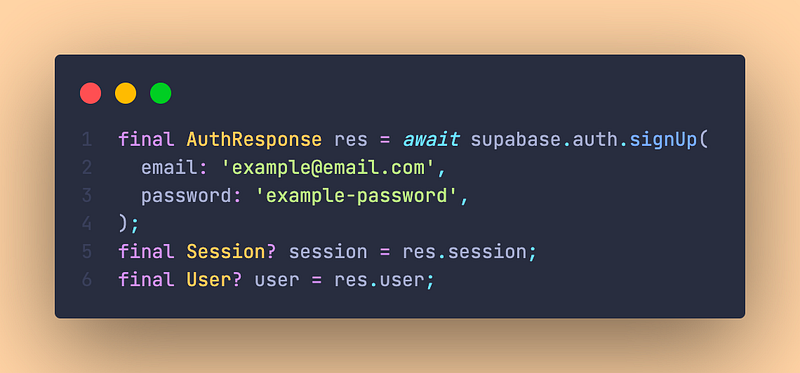
Now, let’s make our first request. We will create an account. To do so, we create a new variable called response or something similar and just call supabase.auth.signUp(). We can specify some things there, that you can get from your own text fields.
After that, we can get the session and the current user with Session and User class.
But what if we don’t know yet if the user is logged in? That is extremely easy in Supabase:
You can get the current session with supabase.auth.currentSession (If there is an active session) and the current user with supabase.auth.currentUser. If you don’t get a user returned, there is no user currently signed in.

And to sign in if the user already has an account, you can just do the following:

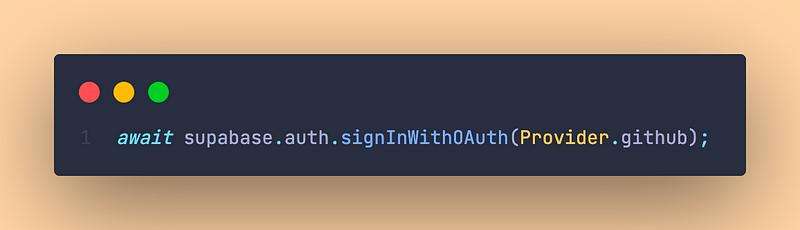
If you want to use other authentication methods, for example, third-party providers like Google, user supabase.auth.signInWithOAuth().
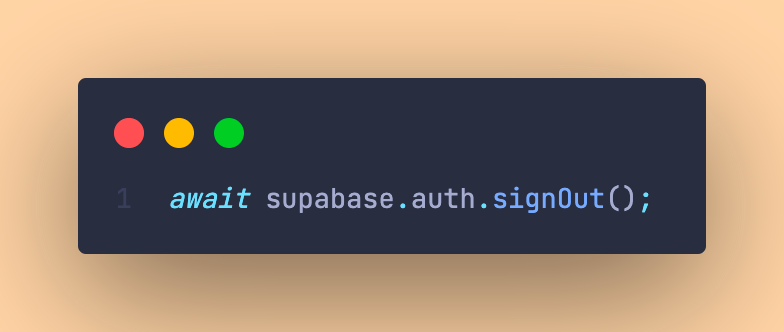
If we want to log out the user, we can just call supabase.auth.signOut()
Great, these were the basics of user authentication in Supabase.
Using Databases
Now let’s talk about Databases.
To create your own Database, or in Supabase called Table, go to the “Table Editor”. There, click on Create new Table and specify a name and the different columns. You can edit them later.
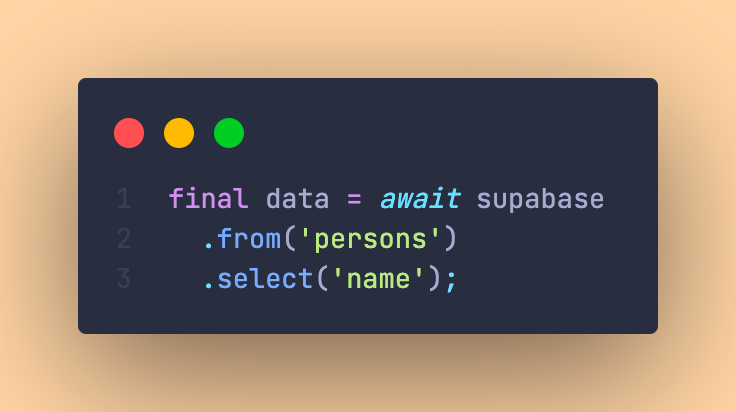
First, let’s fetch the data from our table:
You can also filter with inner joins, query foreign tables, and much more. But because this is just a crash course, we won’t take a deep look into that. If you want to have an article about Supabase Database deep dive, just write a comment and I will do it ;)
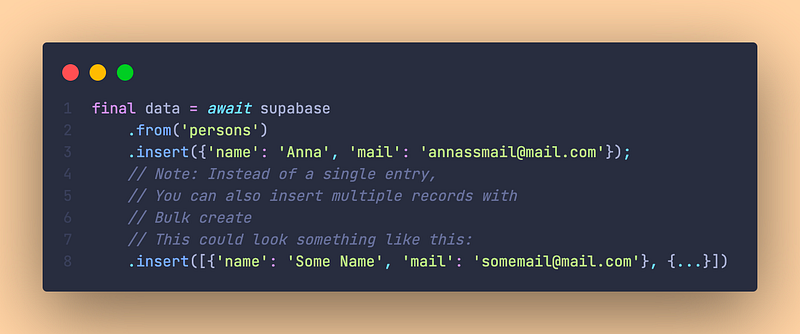
But now we also want to insert data:
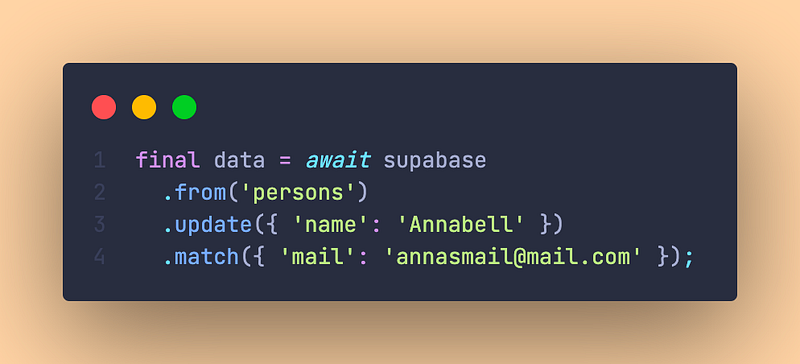
And we need to update our data sometimes:
Okay, great. I can imagine a use case where you want to insert a row if it does not exist yet, but update it when it does exist already. Let’s say you have a to-do list app. The update to-do and create to-do screens are the exact same. So if you don’t always want to specify, if the screen is currently used for creating or updating, just upsert the data:

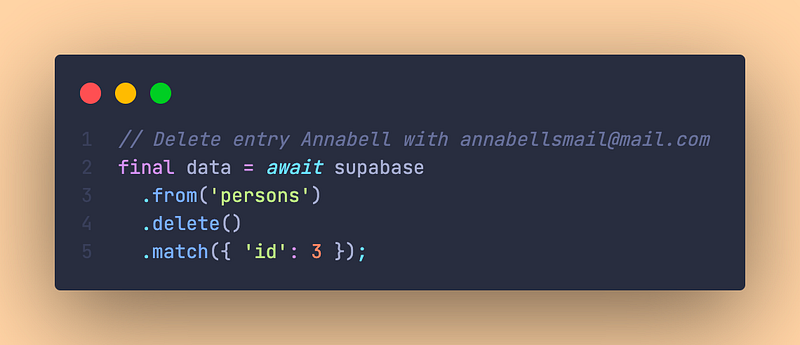
And of course, you can also delete items:
Further reading & Conclusion
In this article, you have learned the basics of the backend solution “Supabase” in Flutter. You have seen how helpful it can be and how easy it is to use. In my opinion, Supabase is quite easy to use backend solution with some advantages.
You can unfold the whole power of Supabase if you use packages like Freezed, Isar, or Riverpod. If you want to learn these additions, I have entire tutorials about them. Check them out here.
In the following few articles, I will introduce more somewhat complicated packages and explain them. If you don’t want to miss this, I recommend you follow me. I tried my best to write the easiest tutorial which everyone understands. If you appreciate this work, I would be very grateful if you could support this quality content and give me some claps!
Thanks for reading, have a nice day!
NOTICE: This article is based on the documentation of the Supabase package. All the information provided here is from this site, the source code is taken from the documentation and was modified in some cases. Supabase Documentation Source: https://supabase.com/docs